Coloring Tutorials // Hardcore Basics // Bleedthrough Basics
November 3, 2025 by Ajey
In this tutorial we’re going to be learning why our markers bleed, how to control it and how to use it to your advantage.
Part 1: Umm can you just not do that?!?
So alcohol markers actually work by pushing dye suspended in isopropyl alcohol. Alcohol evaporates fast and that’s why we have to be mindful of time constraints.
| Things that will just make it worse | |||
|---|---|---|---|
|
Paper Weight Coating Saturation & Layering Hand Pressure Color Intensity |
Thin Paper saturates quickly. Slow absorption, helps blend but you always risk pooling. Repeated passes soak all paper fibers completely. Heavy hand pressure pushes ink deeper. Darker ink will travel further. |
||
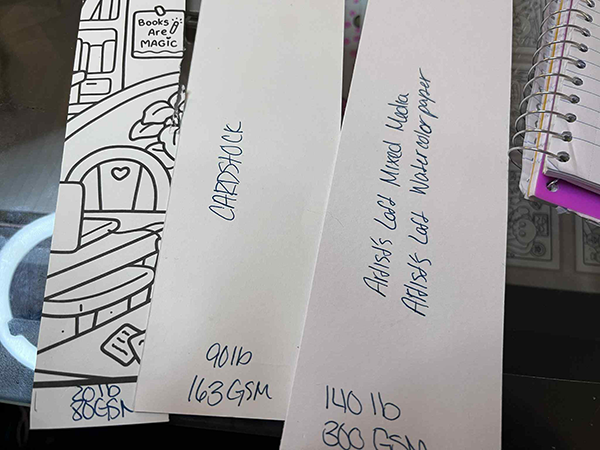
Part 2: Paper types and stuff
Like you were warned this is merely informative. If you would rather learn through trial and error then move on ahead. Alcohol Markers with the lightest hand will work best at 110GSM or higher. Aim for 200+ for best results.Read the damn table.
| Paper Type | GSM | Bleed Risk | Blend Quality | Notes |
|---|---|---|---|---|
|
Marker Mixed Media Bristol Smooth Printer(20lb) Cardstock(110lb) |
70-100 160-200 200-250 75 270 |
Light Moderate Minimal Heavy Minimal |
Smooth Good Crisp Lines Poor SlowBlend |
Resist Heavy Handedness. Single Side. Great for Sketchbook. Feathering risk. Perfect for linework or scanning. Instant Bleeder Ideal for finished pages/printables. |
Okay so how do I fix this?

(Book Used: CocoWyo’s Cozy Corner | You can find it here on Amazon)
Use what you need
In 1 you have our lines just filled in normally. No real effort to stop any bleeding whatsoever. This method is fine most the time if you’re using paper that is more dense. you won’t have much bleeding. Just color one layer softly, wait about 10 seconds and then spot check clean it up after if you are using a lower grade paper or coloring book. It prevents pooling but doesn’t dry completely to allow more blend time.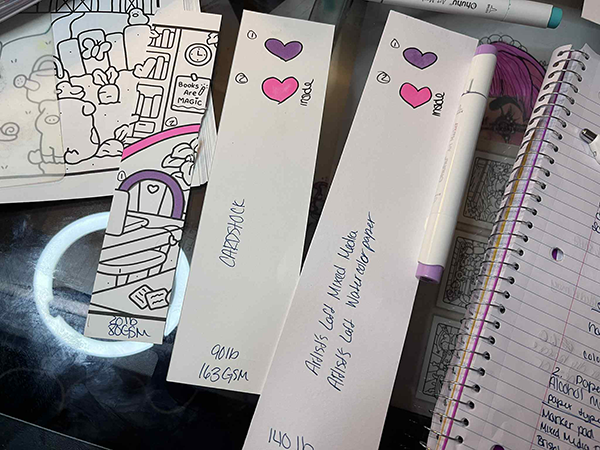
Now in 2 you have our lines filled in going along the inside of our linework. This allows our bleed to happen under the linework and rarely allows it to travel past the line.
Patience is Key
Best blending occurs when it’s wet. If you hold your paper up to a light and it still looks glossy then it’s not done evaporating. Ler her dry before you flip the page, stack it on top of another, or even layer more ink.Blender Mindfulness
Your colorless blender is pure alcohol. Overusing it will actually make your bleed worse. Use it to fade the ink not so much flood the section.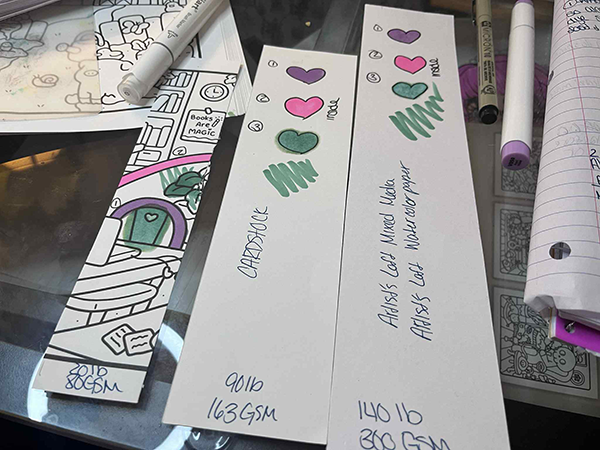
Oh **** too late. Now what?!?
🔲 For scanning & digital cleanup: Scan front side only. Use photoshop to remove faint shadows. Use levels/Curves NOT Brightness/Saturation.
💅 For physical pages: R.I.P. My condolences. Or get creative to repair it.
 Welcome to Artopsy.net! I'm Amanda Jean or Ajey. However way you want to spin it and I'm here to share as much knowledge as I can. I mainly do written tutorials so I apologize if you prefer video. It's overstimulating for me personally to create them. Can't focus on the art if I'm spending half my time trying to film it >:[